GKE(Google Kubernetes Engine) 로 웹 애플리케이션 배포하기
by Jeff
안녕하세요. Jeff 입니다. 이번에는 클라우드 플랫폼 중 잘 알려진 GCP(Google Cloud Platfrom) 에서 제공하는 GKE(Google Kubernetes Engine) 를 사용하여 컨테이너 웹 애플리케이션을 배포하는 방법을 알아보도록 하겠습니다.
1. GCP 환경 구축
- GCP 홈페이지(https://cloud.google.com/) 에 접속하여 Console 로 이동합니다.

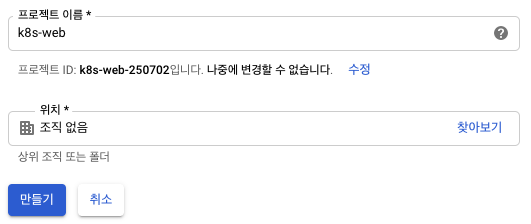
- 프로젝트 이름을 임의로 설정하고 프로젝트를 만들어줍니다.
Google Kubernetes Engine API를 사용하기 위해서는 gcloud API, docker, kubernetes command-line tool 이 필요한데, 사용자 로컬을 이용하려면 모두 세팅을 해주어야합니다.
하지만 구글 클라우드에서는 프로젝트를 생성하게되면 이들이 모두 설정이 되어있는 Google Cloud Shell 을 기본적으로 제공하기 때문에 이를 활용하여 gke를 다루어 보겠습니다.
- 대시보드 오른쪽 상단에 Google Cloud Shell 버튼을 클릭하면 하단에 Cloud-Shell 창이 보이게 됩니다.

2. 컨테이너 이미지 빌드하기
- GKE 는 Docker Image를 애플리케이션 형태로 배포할 수 있는데, DockerFile과 애플리케이션이 필요로 합니다. GKE tutorial 에서 제공하는 Go 언어로 작성된 웹 애플리케이션 샘플을 사용하여 진행하도록 하겠습니다. cloud shell console 에서 샘플을 clone 하도록 합니다.
$ git clone https://github.com/GoogleCloudPlatform/kubernetes-engine-samples
$ cd kubernetes-engine-samples/hello-app
$ cat Dockerfile # Dockerfile 확인
Dockerfile 둘러보기
FROM golang:1.8-alpine # golang 1.8-apine 버전을 사용함
ADD . /go/src/hello-app
# 현재 경로에 있는 모든 것을 컨테이너의 /go/src/hello-app 에 추가한다
RUN go install hello-app # 명령어 실행
FROM alpine:latest
COPY --from=0 /go/bin/hello-app .
# 이전 이미지에서 컴파일 된 bin을 이미지로 복사함. --from 옵션은 파일을 복사할 스테이지 수.
ENV PORT 8080 # 8080 포트를 사용
CMD ["./hello-app"] # hello-app 실행
gcloud config 에 등록되어 있는 프로젝트의 ID 를 검색해 등록하고, docker 이미지를 build 해줍니다.
$ export PROJECT_ID="$(gcloud config get-value project -q)"

$ docker build -t gcr.io/${PROJECT_ID}/hello-app:v1
'''
 gcr.io/${PROJECT_ID}/hello-app:v1 라는 이름의 이미지를 build 합니다.
 gcr.io 는 호스트 이름이고, PROJECT_ID 는 gcp project ID 입니다
 hello-app 은 DockerImage 이름 이고, v1은 버전을 뜻합니다.
'''
$ docker images # 이미지가 성공적으로 build 되었는지 확인합니다.
3. Container Registry 에 빌드한 이미지 업로드
GKE 에서 컨테이너 이미지를 사용할 수 있도록 Container Registry에 업로드해야 합니다.
- Container Registry 인증 및 업로드
$ gcloud auth configure-docker
$ docker push gcr.io/${PROJECT_ID}/hello-app:v1
# Container Registry 에 이미지를 업로드 합니다.
- 확인
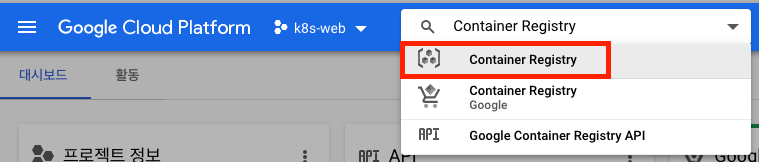
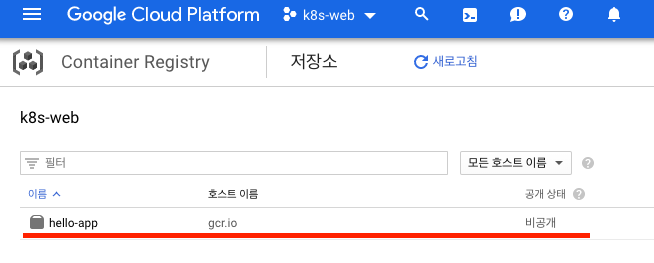
GCP 콘솔 상단 검색창에 Container Registry 를 검색 후 접속하면 이미지가 업로드 된 것이 보입니다.
4. 컨테이너 클러스터 만들기
컨테이너 이미지를 실행할 수 있는 컨테이너 클러스터를 만들어보도록 하겠습니다.
노드가 3개인 hello-cluster 라는 명의 클러스터를 생성합니다.
# 노드가
$ gcloud continer clusters create hello-cluster --num-nodes=3 --region=asia-northeast2
$ gcloud compute instances list
5. Static IP 할당 받기
서비스를 로드 밸런서를 통하여 노출 시키는 명렁어로 하면 랜덤으로 외부 IP 를 할당 해주게 되는데, 만약 서비스를 지우게 되었을 때 이전에 할당받은 IP로 다시 받을 수가 없습니다.
이를 방지하기 위해 static ip 를 사용자 정의로 생성 후 로드 밸런서에 등록하도록 하겠습니다.
- static ip 생성 (gcloud shell 기준)
$ gcloud compute addresses create hello-static-ip --region asia-northeast2
# hello-static-ip 라는 명의 static ip 생성
$ gcloud compute addresses list # static ip list 확인
# (optional) static ip 삭제
$ gcloud compute addresses delete {static-ip-name}
5. 애플리케이션 배포하기
위에서 할당 받은 static ip 를 이용하여 웹 애플리케이션을 배포해보도록 하겠습니다.
$ pwd
# /home/yoonhu1431/kubernetes-engine-samples/hello-app
$ cd manifests/; ls -al
'''
drwxr-xr-x 2 yoonhu1431 yoonhu1431 4096 Aug 23 13:26 .
drwxr-xr-x 3 yoonhu1431 yoonhu1431 4096 Aug 23 13:29 ..
-rw-r--r-- 1 yoonhu1431 yoonhu1431  382 Aug 23 13:26 helloweb-deployment.yaml
-rw-r--r-- 1 yoonhu1431 yoonhu1431  448 Aug 23 13:26 helloweb-ingress-static-ip.yaml
-rw-r--r-- 1 yoonhu1431 yoonhu1431  233 Aug 23 13:26 helloweb-service-static-ip.yaml
'''
$ vi helloweb-service-static-ip.yaml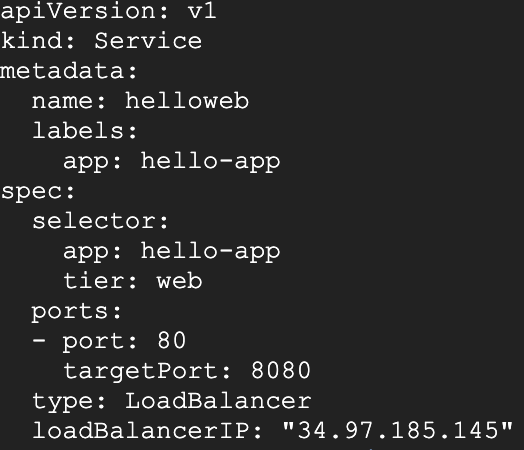
$ vi helloweb-deployment.yaml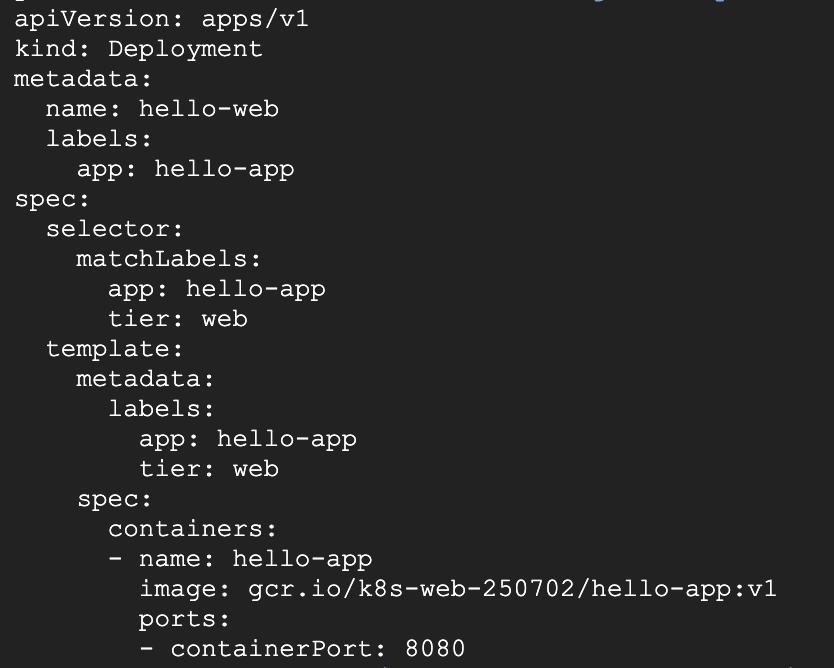
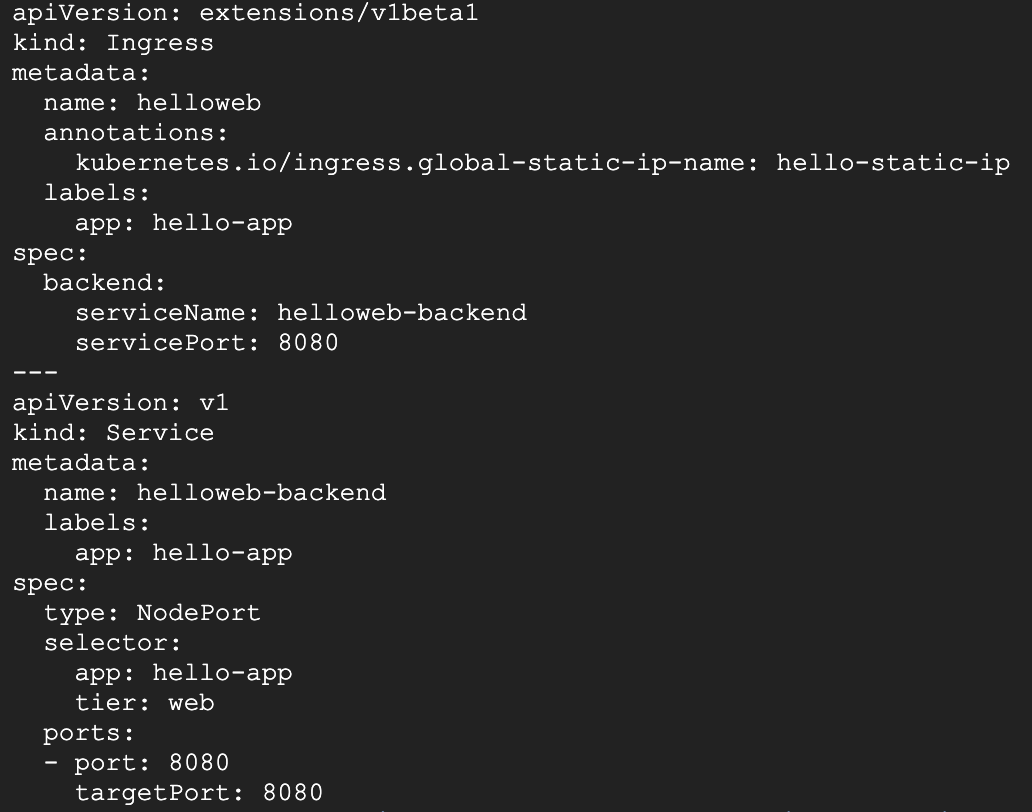
$ vi helloweb-ingress-static-ip.yaml
$ kubectl apply -f helloweb-deployment.yaml # deployments 를 설정해준다.
$ kubectl create -f helloweb-service-static-ip.yaml # 서비스를 생성
$ kubectl apply -f helloweb-ingress-static-ip.yaml # ingress 적용
# 이렇게 적용을 시키면 helloweb 로드밸런서에서 외부 ip 를 노출시키는 작업을 하는데 몇분정도 소요됩니다.
$ kubectl get all
NAME                             READY   STATUS    RESTARTS   AGE
pod/hello-web-676b4fd758-t4pm4   1/1     Running   0          40m
NAME                       TYPE           CLUSTER-IP      EXTERNAL-IP     PORT(S)          AGE
service/helloweb           LoadBalancer   10.23.249.228   34.97.185.145   80:32370/TCP     40m
service/helloweb-backend   NodePort       10.23.246.247   <none>          8080:30287/TCP   39m
service/kubernetes         ClusterIP      10.23.240.1     <none>          443/TCP          47h
NAME                        DESIRED   CURRENT   UP-TO-DATE   AVAILABLE   AGE
deployment.apps/hello-web   1         1         1            1           40m
NAME                                   DESIRED   CURRENT   READY   AGE
replicaset.apps/hello-web-676b4fd758   1         1         1       40m
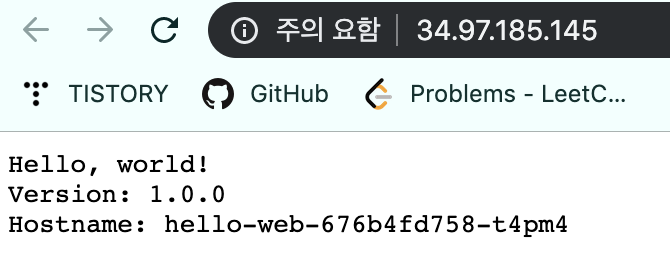
- 배포한 애플리케이션 확인
– helloweb 의 외부 ip 주소로 접속해보면 홈페이지가 보이게 됩니다.
참조 : GKE guide https://cloud.google.com/kubernetes-engine/docs/tutorials/hello-app
Subscribe via RSS